
Tunnel
Purpose
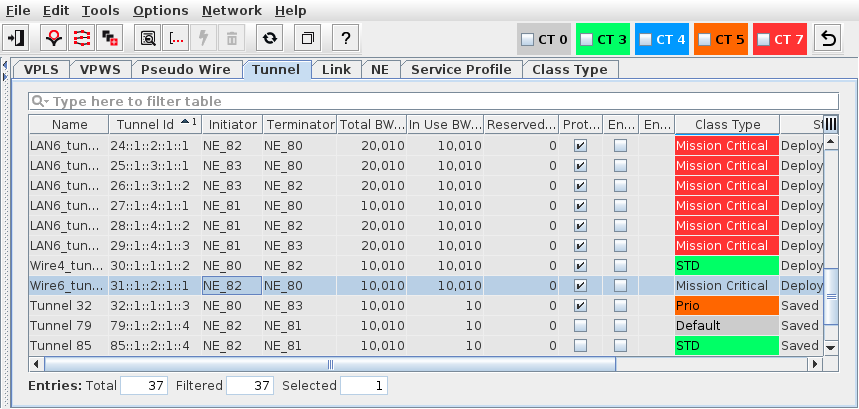
Displays all the existing Tunnels in the ENP.
Allows you to create, see details, modify, deploy or delete Tunnels.
Allows you to create services within a tunnel.
Entries in the tunnel table are filtered with the Class Type Filter on the left hand side (see ENP Main Window).
Please note:
It is possible to create Tunnels without using them directly in services.
Dialog image
ENP – Tunnel
Mandatory entries
Not applicable.
Optional entries
Not applicable.
Informational content
Name | The specified Name of the tunnel. |
Tunnel ID | The Tunnel ID is composed of the five sub identifiers: Tunnel#::Initiator Global ID::Initiator Node ID::Terminator Global ID::Terminator Node ID |
Description | The specified Description of the tunnel. |
Initiator | The ingress LER. |
Terminator | The egress LER. |
Nbr of Pseudo Wires | Shows the current number of PWs that are using the respective tunnel. This column is hidden per default but can be made visible via the column header context menu. |
Total BW [kbit/s] | Configured bandwidth allocated to the tunnel. |
In Use BW [kbit/s] | The total allocated bandwidth of all configured (saved in the database) and deployed services using this tunnel. Note: BFD sessions use an additional bandwidth of 10 kbit/s even if no Pseudo Wire is attached to the tunnel. Also see BFD (Bidirectional Forwarding Detection). |
Reserved BW [kbit/s] | The total allocated bandwidth of all configured (saved in the database) but not yet deployed services using this tunnel. |
Protected | Indicates if tunnel is protected/unprotected. |
Encrypted | A mark in the checkbox indicates that the tunnel has been set up as encrypted tunnel. |
Encryption Status | Indicates if the tunnel actually is encrypted. |
Class Type | Indicates the Class Type used for the tunnel. |
Class Type Id | The ID of the Class Type assigned to the service. This parameter is hidden by default. It can be made visible via the table header context menu. |
Status | Indicates the Status of the tunnel: - Deploying: Indicates the progress of deploying the selected tunnel. - Removing: Indicates the progress of deleting the selected tunnel. - Deployed Valid: The path is complete. The tunnel and LSP(s) are saved in the FOXMAN‑UN database and are deployed to the nodes. A deployed tunnel can be deleted, provided its “In Use” and “Reserved” bandwidths are “0”. It cannot be modified and be set to a Saved Tunnel. - Deployed Invalid: The tunnel is incomplete, i.e. there is a hole in the path. It is saved in the FOXMAN‑UN database and is deployed to the nodes. - Saved OK: The path is complete. The tunnel and LSP(s) are saved in the FOXMAN‑UN database. A saved tunnel can be modified, deployed and deleted. - Saved Incomplete: The tunnel is incomplete, i.e. it is not deployed, or there is a hole in the path. It is saved in the FOXMAN‑UN database. |
Supervision | Service Supervision status, - Running: this tunnel is supervised. Supervision can be paused or disabled via the “Supervision ► Pause” or “Supervision ► Disable…” commands in the context menu or the “Edit” menu. - Paused: service supervision is paused on this tunnel. It can be resumed via the “Supervision ► Resume” command in the context menu or the “Edit” menu. - Disabled: service supervision is disabled on this tunnel. It can be enabled via the “Supervision ► Enable…” command in the context menu or the “Edit” menu. |
Superv. Oper State | Shows the operational state (up, down) of the service supervision on this tunnel. This field is empty when service supervision is disabled. |
Fault State | Shows the highest active fault state of the tunnel. |
Operation | The operation status during deployment or removal: - Deploy Pending, - Deploy Executing, - Remove Pending, - Remove Executing, - Success. |
Controls (buttons, menu items, etc.)
Edit
Calls the Create Tunnel dialog. | ||
Create Tunnel Mesh | Calls the “Create Tunnel Mesh” wizard to create a tunnel mesh over several NEs. | |
Create Tunnel Based On… | Create a tunnel based on an existing tunnel that is currently selected in the table of tunnels. | |
Details Tunnel… | Calls the Tunnel Details dialog, where all information of the tunnel is shown including the attached Pseudo Wire(s). From the Details view, the following actions are possible: - Edit Switches to edit mode, where the currently selected tunnel name, description and bandwidth allocation can be changed. - Save: Saves the modified tunnel to the FOXMAN‑UN database. - Deploy: Deploys the tunnel to the nodes. - Delete: Deletes the tunnel. - Close: Closes the dialog. | |
Show Status Reason… | For a selected tunnel, the reason for any irregular status indication can be displayed in a separate Status window. | |
Modify Tunnel… | Calls the Tunnel dialog in Edit mode, where all information of the tunnel is shown including the attached Pseudo Wire(s). The currently selected tunnel’s Name, Description, and bandwidth (BW) can be changed. In the tunnel graph and in the table of tunnel components you can select any of the components of the working LSP or the protection LSP (where configured). The selected component is marked with a light blue color. From the Edit mode, the following actions are possible: | |
- Set Unprotected / remove Protection (requires Options - Expert Mode): For protected tunnels protection can be removed either by removing the mark in the “Protection” checkbox, or by selecting “Set Unprotected” from the context menu of any tunnel component in the table of the Working LSP or Protection LSP. Note: Deployed tunnels cannot be set to unprotected. | ||
- Set Protection (requires Options - Expert Mode): For unprotected tunnels protection can be added. Once you have activated protection you need to select the “Protection LSP (Incomplete)” tab and route the protection LSP either manually (“Manual Routing”) or automatically (“Automatic Routing” or “Advanced Routing”). | ||
- Modify routing (Manual Routing / Automatic Routing / Advanced Routing): Any link based segment, when selected in the Working LSP or Protection LSP table, can be deleted via the context menu selection “Delete LSP Element”. If required you can cancel such modification before saving it to the database by clicking the “Cancel” button. When a segment is deleted, the entry in the LSP table shows “Hole” in the “Type” column. To define a new segment, use one of the three routing buttons on the right hand side of the LSP table. | ||
- Add BFD (requires Options - Expert Mode): For tunnels without BFD session you can activate BFD. In the Edit mode of the tunnel go to the “BFD” tab and set the mark in the “BFD Session” checkbox of the Initiator. You may also select the CC interval. | ||
- Create End-To-End Encryption (requires appropriate crypto configurations in the Ethernet Security Manager to be successful). The following profiles are available: - [1] Discard: Discard all traffic, - [3] Encrypted & Authenticated without OAM: Encrypt and authenticate all traffic; do not use OAM, - [5] Encrypted & Authenticated with OAM: Encrypt and authenticate all traffic; use OAM. | ||
- Create Hop-By-Hop Encryption (requires appropriate crypto configurations in the Ethernet Security Manager to be successful). The following profiles are available: - [1] Discard: Discard all traffic, - [3] Encrypted & Authenticated without OAM: Encrypt and authenticate all traffic; do not use OAM, - [5] Encrypted & Authenticated with OAM: Encrypt and authenticate all traffic; use OAM. | ||
- Delete Encryption: Removes the encryption from the selected tunnel. | ||
- Save: Saves the (modified) tunnel to the FOXMAN‑UN database and returns the dialog to view mode. | ||
- Deploy: Deploys the tunnel to the nodes. | ||
- Delete: Deletes the tunnel. | ||
- Cancel: Closes the dialog without tunnel modification. | ||
Deploy Tunnel | Deploys the currently selected saved tunnel(s) to the nodes. This option is only available when the selected tunnel is saved, but not deployed yet. Notes: - No check is done between the modified tunnel and the service profile tunnel routing parameters. - The progress of the tunnel deployment can be monitored in the “Status” column. | |
Delete Tunnel | Deletes the currently selected tunnel(s). This option is only available for tunnels without any Pseudo Wire attached. To check this, select “Tunnel Details” and choose the “Attached Pseudo Wires” tab. If you want to delete a tunnel with “In Use” and/or “Reserved” bandwidth you need to delete any Pseudo Wires using the tunnel beforehand. Tunnels without Pseudo Wire attached only use bandwidth when they have active BFD (Bidirectional Forwarding Detection) sessions. Note: It is not possible delete a tunnel with attached Pseudo Wire(s). Note: The progress of the tunnel delete can be monitored in the “Status” column | |
Synchronize Tunnel… |  | Synchronizes the selected tunnel(s) among ENP database and network so that misalignments are removed if technically possible. |
Encryption - Encrypt Tunnel… |  | From the context menu of the tunnel table, opens a dialog to select the encryption profile to be applied to the selected tunnel(s). Requires appropriate crypto configurations in the Ethernet Security Manager to be successful. The following profiles are available: - [1] Discard: Discard all traffic, - [3] Encrypted & Authenticated without OAM: Encrypt and authenticate all traffic; do not use OAM, - [5] Encrypted & Authenticated with OAM: Encrypt and authenticate all traffic; use OAM. As an option, hop-by-hop encryption can be selected. A confirmation is required; click “Yes” to confirm or “No” to cancel the operation. |
Encryption - Decrypt Tunnel… |  | From the context menu of the tunnel table, removes the applied encryption from the selected tunnel(s). |
Copy Tunnel(s)… | Copy one or several selected tunnel(s). This opens a dialog to create one or several copies of selected tunnel(s). See ENP – Copy Tunnel. | |
Supervision ► Enable… | Enable supervision for this tunnel. To do that, the service information attributes Customer, Service Level Agreement, and Network need to be selected. | |
Supervision ► Disable… | Disable supervision for this tunnel. Must be confirmed by the user. If any service supervision cannot be disabled, an error message is shown with the respective reason(s). | |
Supervision ► Resume |  | Resume service supervision that has been paused before. |
Supervision ► Pause |  | Pause service supervision. |
Supervision ► Reload Configuration | Reloads the configuration from the NEs to make sure it is up to date in case of recent changes to the tunnel. | |
Supervision ► Show Details… | Show service supervision details for this tunnel. Opens the service in a view-only window of the Service Editor. The windows also provides an alarm tab showing active alarms of the tunnel. | |
Supervision ► Show in Service Supervision… | Opens the service supervision dialog with a filtered view for the tunnel. |
Tunnel Context Menu
See “Edit” above.
ENP – Copy Tunnel

Mandatory entries
None.
Optional entries
Class Type,
Number of Copies,
Name,
Description,
Total BW,
Copy Bfd,
Copy Protection,
Coy Encryption,
Min Label,
Max Label.
Informational content / controls
Select Class Type | Lists existing Class Types, of which one or several can be applied to the new tunnel copies by setting a mark in the check box. For each of the selected Class Types a tunnel copy is created. If no Class Type is selected the Class Type(s) of the original tunnel(s) remain valid. | |
Number of Copies | Enter the number of required tunnel copies. The maximum is 100. | |
Old Tunnel | Name of the original tunnel. This field is read-only. | |
Name | Name of the new tunnel; the default name is the name of the original tunnel, supplemented by “_copy_N”, where N ranges from 1 to 100. The name can be edited in-line. | |
Description | Description of the tunnel. This field can be edited. | |
Total BW [kbit/s] | The total bandwidth in kbit/s of the new tunnel. This field can be edited. | |
Class Type | The Class Type of the new tunnel. The default Class Type is the same as for the original tunnel. A different Class Type can be set by selecting an existing Class Type in the upper left area. For each selected Class Types a tunnel copy is created. | |
Copy Bfd | Defines whether the BFD setting shall be copied from the original tunnel. Depending on the original settings, this may or may not be changed. | |
Copy Protection | Defines whether the protection settings shall be copied from the original tunnel. Depending on the original settings, this may or may not be changed. | |
Copy Encryption | Defines whether the encryption settings shall be copied from the original tunnel. Depending on the original settings, this may or may not be changed. | |
Min Label | The minimum for the tunnel label range. | |
Max Label | The maximum for the tunnel label range. |
Related dialogs / windows