
Create Service Profile
The “Create Service Profile” wizard is started with the “+ Create” button from the ribbon of the Service Profile tab in the MPLS-TP Map.
An existing service profile cannot be modified, but only deleted, or a new service profile can be created using an existing one as template (Ribbon command “Create Base On” for a selected service profile). The wizard for the “Create Base On” command is the same as for the “+ Create” command, but parameters are taken over from the template service profile and can be modified.
The wizard leads you through 6 basic steps of creating a new service profile for your MPLS-TP network.
The steps below show the creation of a sample tunnel,
Please note:
For many of the parameters, a parameter change option is available that can be set to “fixed” or to “variable”. When set to fixed, the respective parameter will remain fixed when the service profile is applied to a service during service creation. When set to variable, the respective parameter can be modified during service creation with that service profile applied.
Step 1: General
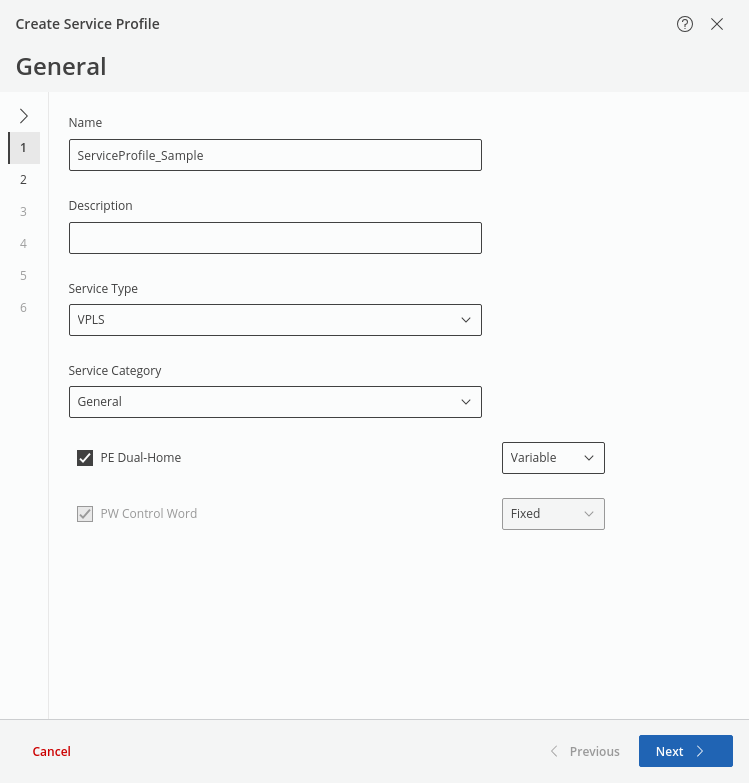
This step requires at least a unique name for the new tunnel, and selection of an appropriate service type is strongly recommended before proceeding to the next step. The service type determines the applicability of the service profile to services and the availability for selection of further options, such as PE Dual-Home and PW Control Word.
• For service type VPWS, PE Dual Home is always disabled.
• For service type VPLS, if PE Dual Home is enabled, the PW Control Word is always enabled, and BFD Session will always be enabled in step 4.
Whether or not an NE is Dual-Home capable can be checked in the NE details. For checking its capability, select an NE on the map, then click on “Details” in the ribbon. In the NE details select the “MPLS” tab and verify there is an “OK” mark for “PE Dual Home Capable”.
Service Category provides the options (General, Transparent Clock without CW, Transparent Clock with CW; default is: General).
It is possible to create new service categories.
Click “Next >” to proceed to step 2.
Step 2: Bandwidth / Rate Limiting
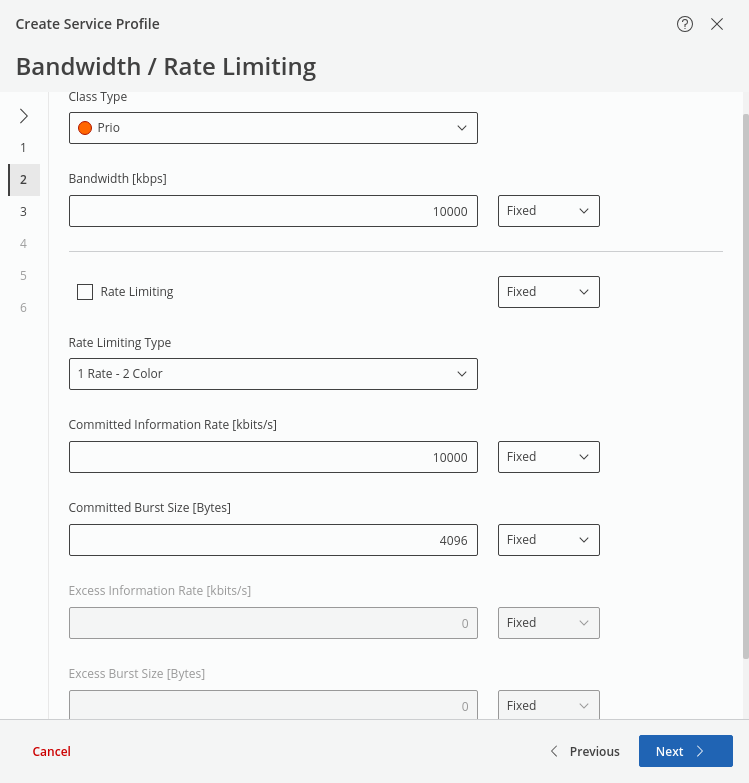
This step is used to select the Class Type (see Class Type and HQoS Configuration Manager), and define bandwidth and rate limiting parameters. If rate limiting is enabled, selection of an appropriate rate limiting type is strongly recommended. Alternatively, the default settings can be used.
Click “Next >” to proceed to step 3.
Step 3: Quality of Service
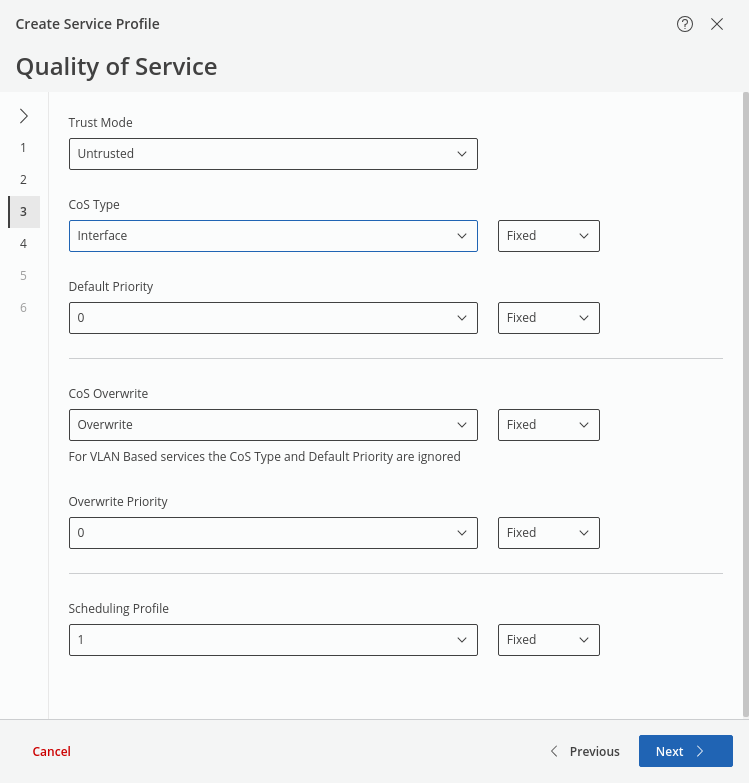
This step sets QoS parameters such as
• Trust Mode (Untrusted, Trust Layer 2, Trust Layer 3),
• CoS Type (Interface, PCP, DSCP),
• Default Priority (0 … 7),
• CoS Overwrite (Maintain, Overwrite) - if set to overwrite, the CoS Type and Default Priority are ignored for VLAN based service,
• Overwrite Priority (0 … 7),
• Scheduling Profile (1 … 5).
Click “Next >” to proceed to step 4.
Step 4: Tunnel
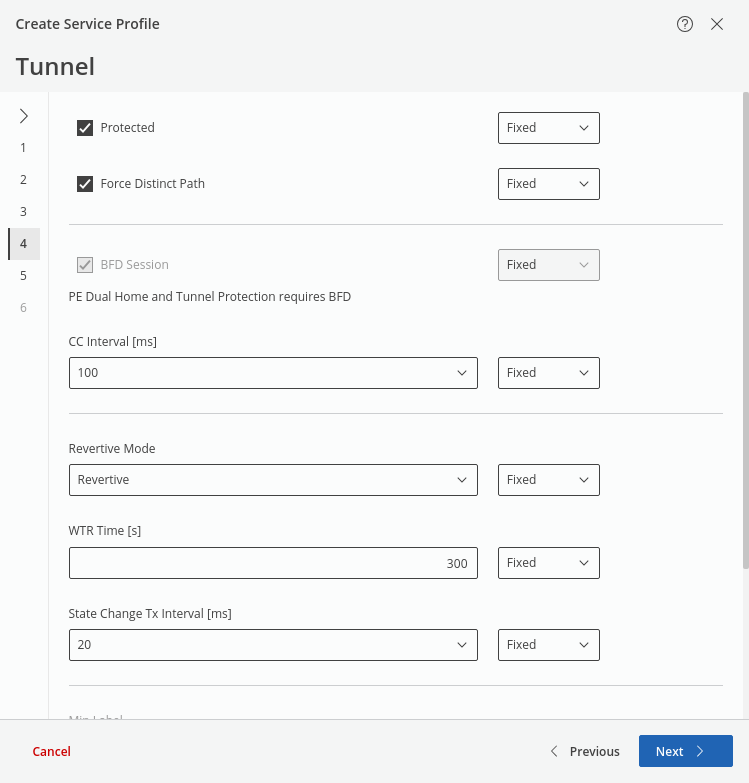
This step sets the tunnel related parameters, such as
• Protected (enabled, disabled),
• Force Distinct Path (enabled, disabled),
• BFD Session (enabled, disabled) - if PE Dual Home is enabled (step 1) or if “Protected” is enabled, BFD Session is always enabled.
• CC Interval (range: 3.3 … 1000 in 8 steps),
• Revertive Mode (Revertive, Nonrevertive),
• WTR Time [s] (range: 5 … 720),
• State Change Tx Interval [ms] (range: 3.3, 10, 20),
• Min Label (default: 3000),
• Max Label (default: 1048575).
Depending on the settings in previous steps, some of the parameters cannot be set.
Click “Next >” to proceed to step 5.
Step 5: Routing
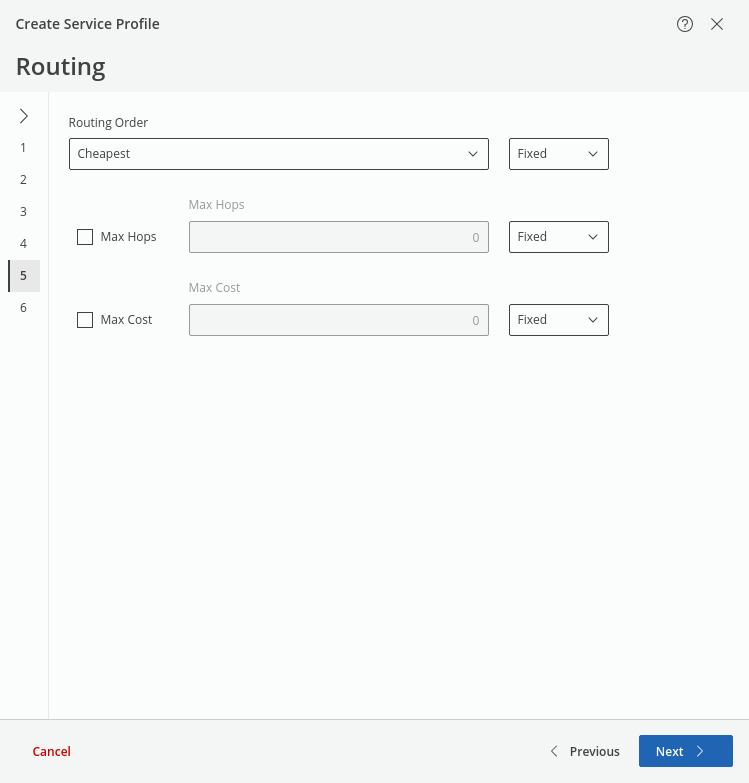
This step sets the routing parameters:
• Routing Order (BW Optimized, Cheapest, Shortest; default is: Cheapest),
• Max Hops (enabled, disabled; default is: disabled). If enabled, the number of hops can be set (range: 0 … 32767),
• Max Cost (enabled, disabled; default is: disabled). If enabled, the number of hops can be set (range: 0 … 32767).
Click “Next >” to proceed to step 6.
Step 6: Summary
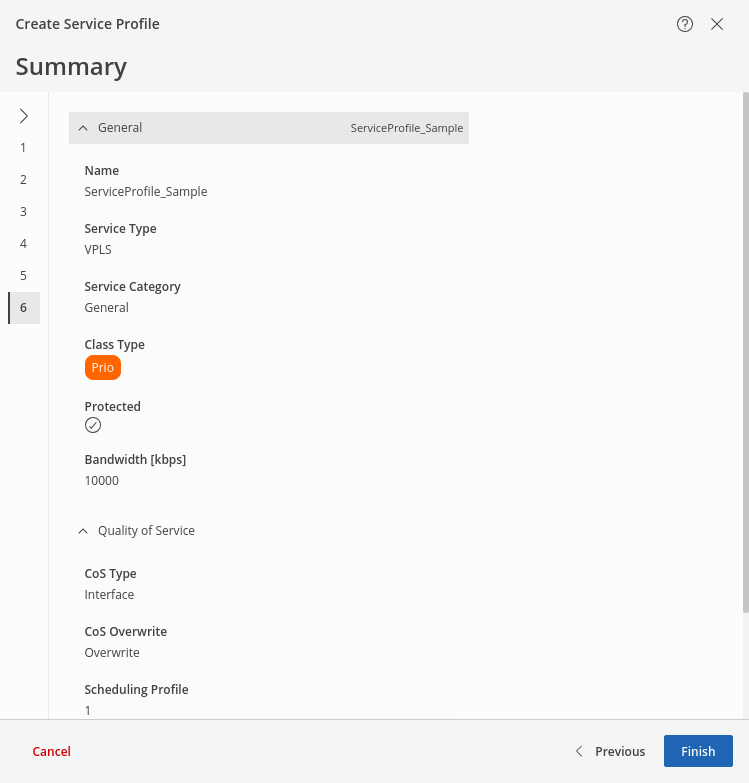
This step provides a summary of the service profile settings.
Click “Finish” to save the service profile, close the wizard, and return to the MPLS-TP Map view.
The newly created service profile is added to the list of available service profiles.
Please note:
After creation, any selected service profile(s) can be exported (i.e., saved to disk) via the action menu command “Export”. The command is called via the three-dot menu in the ribbon upon selecting one or several service profiles from the list.
The ribbon also provides the “Import” command to import service profiles saved earlier.