
Step-by-Step Procedure
The following order of actions is required for upgrading a FOX61x with a system release R16B state to ESW that is part of the system release R18.
ESW upgrade procedure
Proceed as follows:
1. Start the FOXCST.
2. Select the menu command “File - Manage ESW …”.
3. In the “ESW Package Manager” dialog window click on the “Import” button.
- Browse to the appropriate folder or file source containing the new ESW and SIM files (see the appropriate columns in Table Upgradeable Units and ESW with System Release R16B).
- Select the ESW zip file needed to get your units to the “R18” status.
- Click on the “Open” button.
- Select the software types (all, .esw, .sim, none) to be imported.
- Wait until all ESW files have been imported.
- Close the “ESW Package Manager” dialog with the “Close” button.
4. Connect to the FOX61x to be upgraded (via the menu command “File - Connect …”) with the “User Class” set to “Manager”.
5. Check the equipment.
- Make sure the equipment status (FOXCST Tree View) is “Ok” for all units to be upgraded. If this is not the case, take the appropriate measures to correct this before proceeding.
- Make sure there are no equipment related alarms active (FOXCST “Alarms” view). If you have equipment alarms, take the appropriate measures to correct this before proceeding.
6. Perform a “Save to NE” operation to store the current running configuration to the NE database.
7. Create a backup (to your PC) of the network element configuration.
- This is done on the FOXCST GUI by using the menu selection “File - Save Configuration To Disk …” or “File - Save Configuration To Disk As …”.
Please note:
FOXCST keeps the file name; without disconnection/reconnection, a later config save overwrites this original saved file without confirmation dialog.
8. Start the software download manager.
- Select the menu command “Tools - Software Download …”.
- Wait until all plugged units are listed in the table.
9. Configure the software download.
- In the “Available System Releases” selection box select the system release “R18 (FOX61x)”.
- Check the “Software to install” column of all units to show the correct Software for the unit, including the core unit (one or two CESM1, (CESM2) or CESM3) and the core unit’s neController (CESM1 (and CESM2) only) (see Table Upgradeable Units and ESW with System Release R16B).
- The “Status” column shows “Software needs to be downloaded”, “Software is downloaded”, or “Software is running”, depending on the current condition.
- Mark the checkboxes “Delete unused software” to make sure there is enough space in the flash memory of the unit.
10. Double check that all settings displayed in the “Software Download” table are correct.
11. Start the upgrade
- When all required units are configured, click on the “Download and Start …” button.
- When prompted with “Parameters for command Download and Start” set the Algorithm to “System Release Upgrade”:
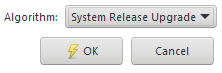
- Click “OK” to apply the settings and start the upgrade process.
- This will first delete unused software (ESW) files where necessary, download the new software (ESW) to the units to be upgraded, then restart the ESW on the units to be upgraded.
- Do not close the “Software Download” dialog while the upgrade process is running.
12. Since you will lose the management connection to the FOX61x during the restart of the core unit(s), you need to re-connect to the FOX61x when the ESW upgrade has been completed.
13. After re-connecting check that everything is OK with the upgraded core unit(s) and service units.
14. Perform a “Save to NE” operation.
- This will create a new database.
15. Create a backup (to your PC) of the network element configuration.
- This is done on the FOXCST GUI by using the menu selection “File - Save Configuration to Disk …” or “File - Save Configuration to Disk As …”.
Result: You have successfully upgraded your FOX61x.
End of instruction
Please note:
If the upgrade was not successful for any reason, you might need to restore the backup configuration (i.e. the file stored to your PC in step 7. above) to your FOX61x. This is done by downloading the saved FOX61x R16B backup file to the NE.
→ Before downloading the saved backup file make sure that the ESW files used in R16B system release are still available on the units. If required for any reason, download all missing ESW files via the FOXCST menu function “File > Manage ESW … > Import”.
→ Download the backup file via the FOXCST menu function “NE > Download Configuration …”. Select the previously stored .tar file to be downloaded.
→ If the conditions remain that have led to an unsuccessful upgrade contact Hitachi Energy technical support (see section Technical Support) for assistance.