
Manage Maps (Map Manager)
The Map Manager is called
• from the user settings menu by clicking on “Manage Maps” or
• from any map by clicking on the map icon ( ) in the upper left corner of the map.
The map manager allows you to select an existing map to edit to create a new map. It also includes functions to manage icons and backgrounds used on the maps.
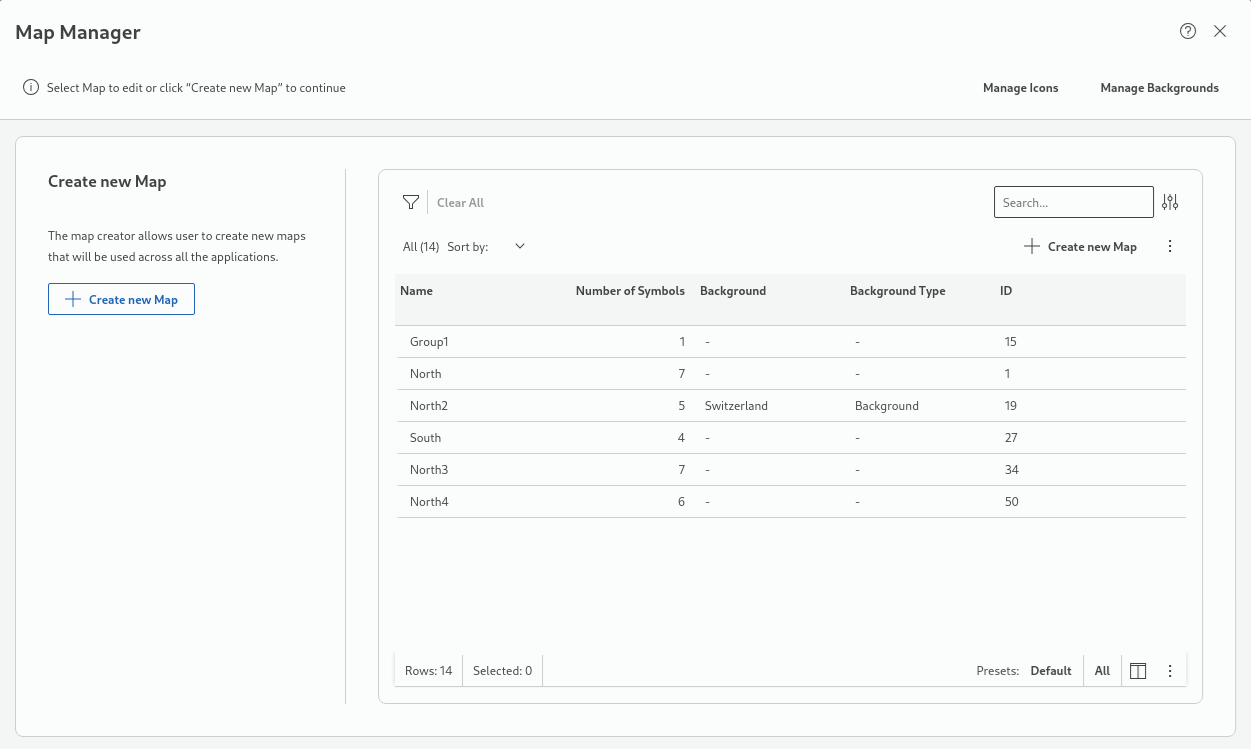
In the Map Manager you can
• click on “+ Create new Map” to start the map creator;
The map creator provides the same features as the “Edit selected Map” command described just below.
• select an existing map from the list of maps to edit it;
an existing map selected from the list activates the ribbon commands:
− Duplicate Map
This opens a pop-up name field to edit the proposed name, which is by default the original name with “(Copy)” appended. By clicking on “Duplicate”, the new map is created and added to the list.
− Edit selected Map
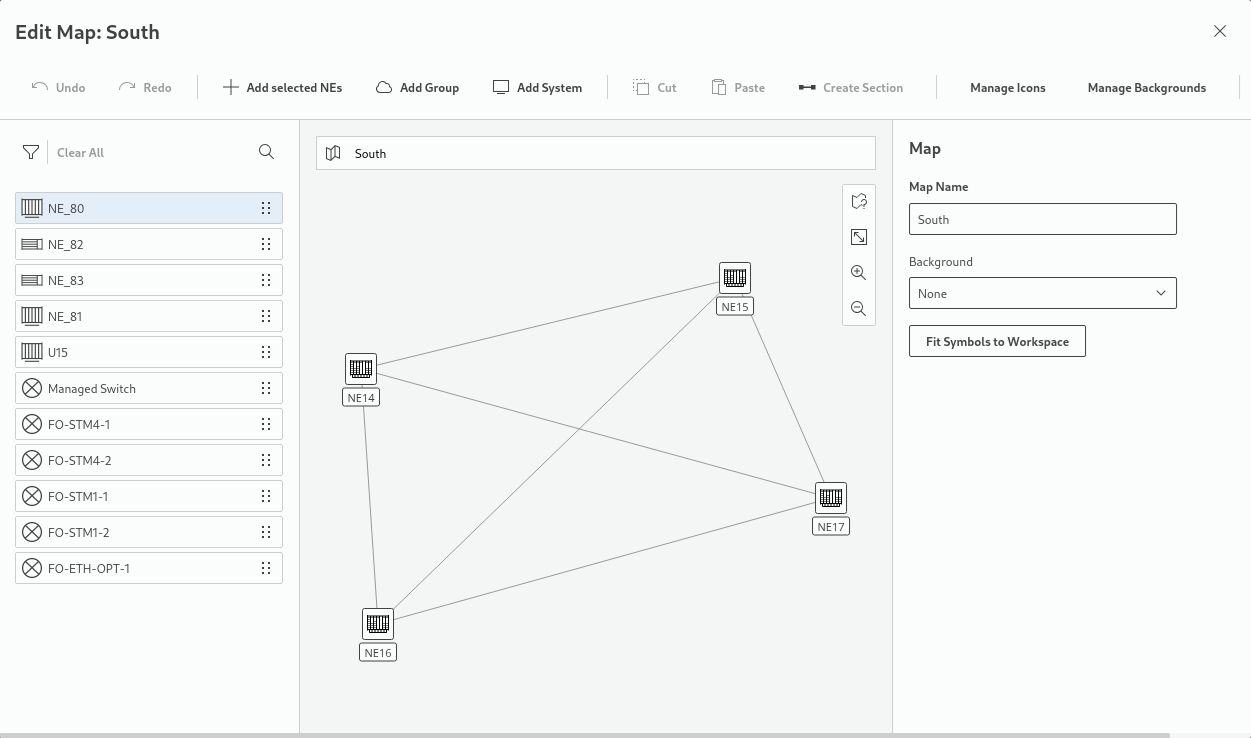
This opens the selected map in a map editor. For newly created maps, you should provide a map name and select a background (optional). You can add selected NEs, create sections, add groups, cut or paste elements, undo or redo actions, manage icons, manage backgrounds, edit the map name, and select a different background.
− Existing elements on the map can be moved after selecting the element on the map using the pointing device, then dragging it to the required place on the map. An element selected on the map can be deleted from the map. It will then be added to the list of available elements again.
− New elements can be added to the map by selecting the element from the NE, System, or Group list on the left-hand side, then dragging it to the required place on the map. When added to the map, the element will be removed from the list.
− Sections can be created while creating a new map, or using the section manager. To create a section, select two NEs on the map while keeping the CTRL key pressed, then click the “Create Section” command from the commands bar. This will open the Create Section dialog.
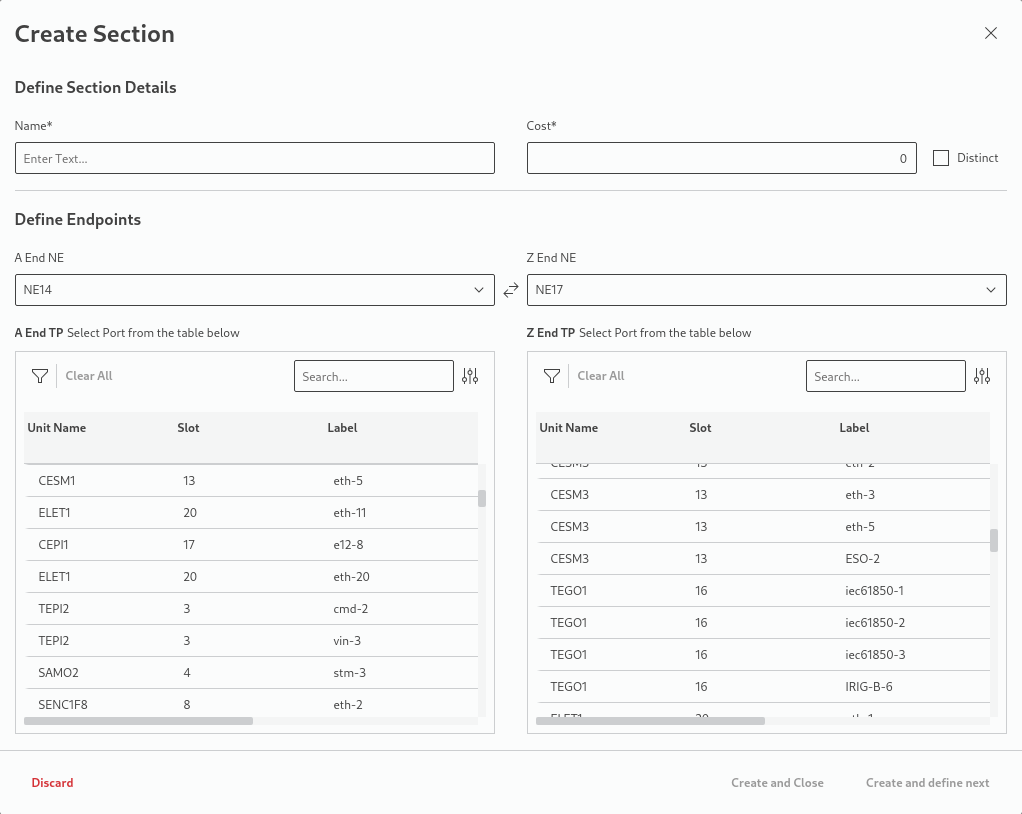
In the Create Section dialog, enter a name and the cost for the section, require the section to be distinct, and select the A End TP and Z End TP, i.e., the termination points on both ends of the new section. To restrict the choice of TPs, use the filter ( ) or the search option. When done, either create the section and close the dialog or create the section and continue with creating the next section.
− Groups are added by clicking “Add Group”, which will add an automatically named group symbol to the map. The group, when selected, can be renamed, its icon can be changed, or the group can be deleted.
To edit a group, select the group symbol on the map and click “Open Group” in the right panel. Once the group has been edited, return to editing the map by clicking on the map name in the breadcrumb path of the map address bar.
If NE symbols are outside of the workspace, the button “Fit Symbols to Workspace” helps you arrange them on the visible workspace.
Icons
Icons can be added or removed via the “Manage Icons” button, which opens the Icons Manager. Filter presets are available for
− Network Element,
− Foreign Object,
− Group,
− System.
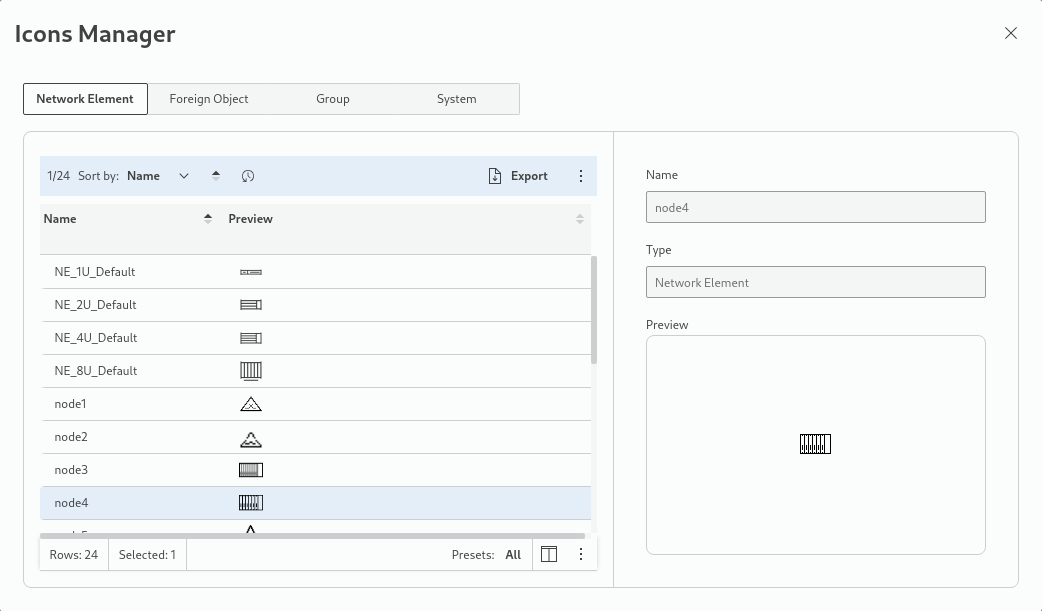
The Icons Manager allows you to import, export or delete icons, and to export the table data to a file. When selected, table data is exported to a CSV file with a choice of the following options:
− Column separator: , or ;
− Line separator: CRLF or LF
− Include header: enabled or disabled.
When selecting to export the file, a file browser opens with a proposed folder and filename, which can be changed as required. After successful export, the dialog is closed.
Once done with managing icons, click on the close ( ) icon in the upper right corner of the Icons Manager modal to close the dialog.
Backgrounds
Backgrounds can be added or deleted via the “Manage Backgrounds” button, which opens the Backgrounds Manager.
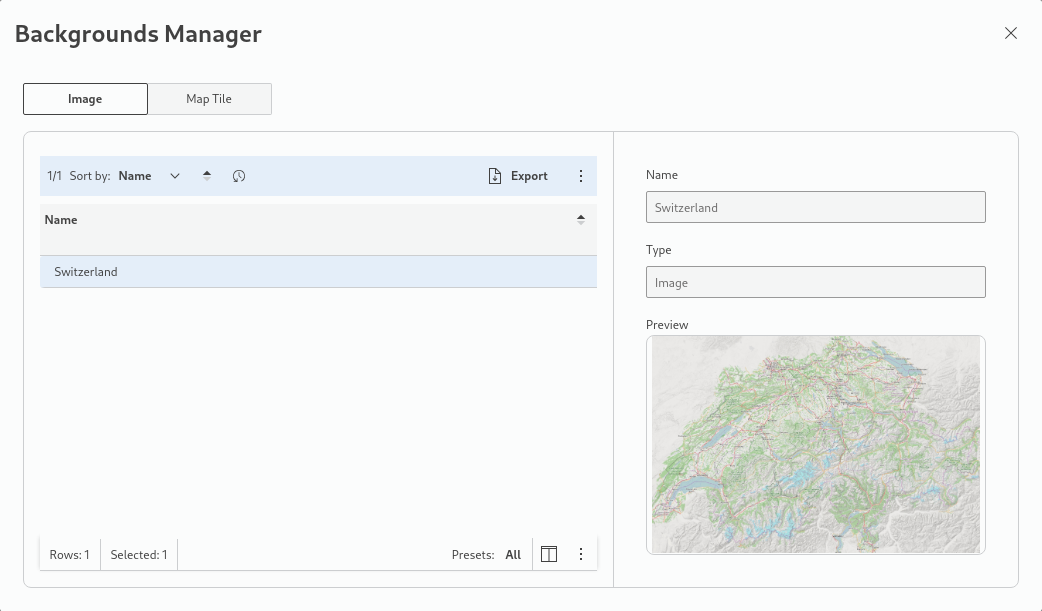
The Backgrounds Manager allows you to import and preview images that can be used as map backgrounds. It also provides a feature to manage map tiles by adding URLs to a web server providing access to map tiles. While adding a Map Tile, a server URL that is entered can be verified by clicking on “Test” next to the address field. If the URL is valid, a preview of the map is shown in the Map Preview window. Note that online access to the server is required to use the tiles.
Once done with managing backgrounds, click on the close () icon in the upper right corner of the Backgrounds Manager modal to close the dialog.
− Delete Map
This opens a pop-up dialog to confirm the deletion. Click “Delete” to execute the command. This will remove the map from the list.
Once done with managing maps, click on the close () icon in the upper right corner of the Map Manager modal to close the dialog.