
Steps to commission FOXMAN-UN client for Windows®
Please note:
When operating a firewall between your Windows® machine and your FOXMAN-UN server, make sure to open the appropriate ports in the firewall configuration. Details can be found in the application note “1KHW029012 FOXMAN-UN in Firewalled Environment” that is part of the FOXMAN-UN documentation.
Please note:
When connecting to the NEM core for the first time, the NEM Help will be downloaded from the server if installed there.
To set up FOXMAN-UN client for Windows®,
Proceed as follows:
1 Start the NEM Login. This presents the NEM Login dialog:
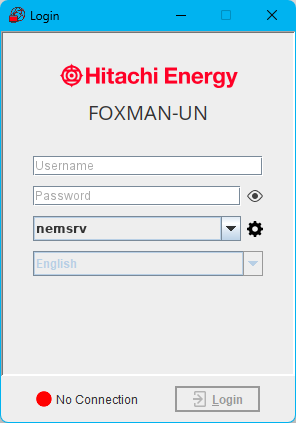
You will need a connection to the FOXMAN-UN core machine. The FOXMAN-UN Windows® client won’t be usable unless you have a running connection to the core machine.
2 Use the “Settings” button  to open the “Host Manager” dialog.
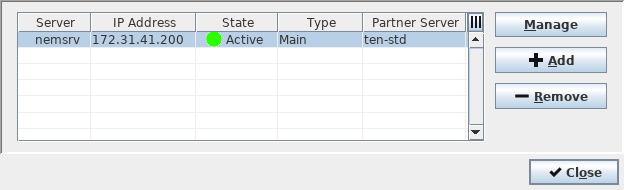
to open the “Host Manager” dialog.3 Select the “+ Add” button to open the “Edit Connection” dialog and enter the name and the IP address of the workstation running the FOXMAN-UN core.
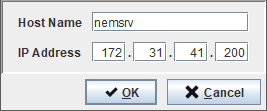
4 Click “OK” to close the “Edit Connection” dialog.
5 Exit from the Host Manager. You get back to the NEM Login.
6 Enter the “User Name” and “Password” and click “OK” to log in to the FOXMAN-UN. This will start the NEM Desktop.

In case you don’t know user name and/or password contact the administrator of the FOXMAN-UN core machine.
In case you don’t know user name and/or password contact the administrator of the FOXMAN-UN core machine.
7 Start the NEM Configurator
8 If required, change the size of the NEM Configurator window and select the columns of the details panel as required. Refer to the Help system under “NEM Configurator - Main Window” for details.
End of instruction
These settings as well as all other settings defining size of windows and their location on the screen are saved in a persistence files on a per user basis.
Please note:
The “user” in this case is the user logged in at the PC, not the FOXMAN-UN user.
If you are planning to perform large inventory requests from your network by using the NEM Desktop function “Inventory Request…” from the “Network” menu, you might need to make a modification to the “nem.conf” file of the FOXMAN-UN core installation as follows: Uncomment the following key-value line, and make sure the value is set to “large”:
client_memory_conf large
You are now ready to use the NEM Configurator or the NEM Network Browser and perform management functions according to the privileges and access rights of the FOXMAN-UN user you used to log in to FOXMAN-UN.